Lessons in the fundamentals of ‘seeing’ as an artist.
As artists we are faced with many challenges in our desire to represent a 3 dimensional world on a 2 dimensional surface. Over thousands of years artists have struggled with how best to translate their artistic vision and thankfully today a vast tapestry of techniques and skills exists for us to utilize.
Taking just one thread, let’s begin by looking at some simple techniques to answer that vexing question…how do I make my subject look solid?

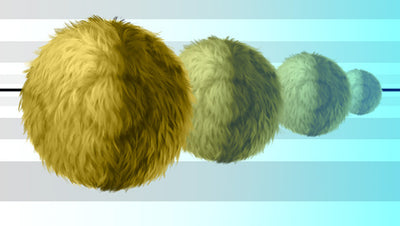
In figure (A) we have a simple 2 dimensional circle. Consider this to be the basic shape of your subject. Now lets take it into the 3rd Dimension.
Light reveals form to us.
The form of your subject is constantly turning and light spreads around the form in a penumbra of light through to shade. It is important to remember that if you desire convincing solidity, all form in your artwork should by lit by the one source. 
In figure (B) we see form revealed in its simplest way. We have one big light shape and one big dark shape. Note how the shadow line follows the shape of the form, which helps to imply the volume of your subject. This is an important stage, as the relationship of these two tones, describes the quality of the light source. The stronger the contrast, the brighter the light (eg sunny day), the closer the tones the duller the light (eg overcast day).
Also, the quality of the edge defines the quality of the form. A soft edge hints at a rounded, smooth form whilst a harder edge suggests an angular, textured form. However ‘edges’ are for another tutorial so I’ll get back on track. 
The next stage in creating convincing form is to add the reflected light to the shadow side. Figure (C) shows how reflected light has the effect of turning the form in the shadow.
When light reaches a surface it is reflected into surrounding surfaces, in varying degrees of intensity, depending upon the reflective quality of that surface. It can be seen clearly if you hold a light piece of paper against a shadow area, for example under your chin. Observe this in a mirror and see how all the forms in shadow are lightened along their outer edge and are also influenced by the colour of the reflecting surface. Try a yellow or red piece of paper!
It is important to note however, that as a secondary light source, it is ALWAYS very subtle (1/2 to 1 tone lighter). Never make it too light or it will jump out of the shadow and compete with your main light source, flattening your form instead of turning it!
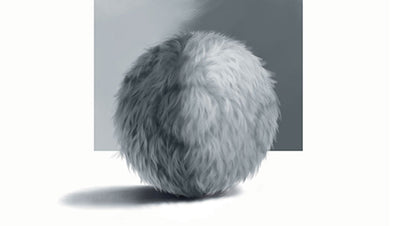
Figure (D) represents the steady building of form towards the highlight. The amount of tones leading to the highlight will vary depending upon the surface. As a general rule the rounder and smoother the form the more tonal gradations will be needed. The opposite applies to blocky and rough textured surfaces, where the fewer subtle planes of the form make for less gradation.
This is the fun part, where you bring the sparkle of detail and texture into your artwork. However the temptation is always to put these on to early. Build to the climax of the highlight, with successively lighter tones. A highlight will never have its true impact unless you have built a solid form underneath.
Note also that a highlight follows the direction of the form.
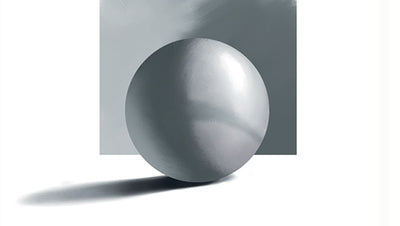
Figure (E) shows the important stage of placing the shadow. This has the effect of grounding your form and giving it a sense of weight. An important thing to observe about shadows, is that they are darkest at their source and become lighter and softer edged as they move away from the form. With the completion of this step we have transformed our basic flat shape, into a solid form, existing in space. We have not only given it solidity but have described its surface and the quality of the light source.
Cast Shadows

Figure (F)
A useful technique to emphasize the form of your subject is to utilize cast shadows. Any object that blocks light on your subject can cast a shadow across it. You can see this phenomenon at work if you look at tree limbs on a sunny day and see the shadows from other limbs falling across each other. Notice how the cast shadow follows the form of the subject, tapering as it moves around the form to the edges. A cast shadow is always subtle, with soft edges, and is like a transparent glaze across the varying tones of the light side of the form.
Tonal Contrast

Figure (G)
By increasing the contrast of one tone against another you can make edges jump out. You can utilize this technique to push the form of your subject out from the background, by placing slightly darker or lighter background elements behind your subject. This may take the shape of a lighter or darker leaf, rock or other object and can serve to emphasize your subject.
I hope this has been of some help as the first in a number of brief tutorials. There is certainly more to explore and expand upon in our quest to create better art. In the next tutorial I’ll discuss adding convincing detail to your form without losing that sense of volume. If you have any questions about what I’ve discussed simply contact me.